 |
GREATDANELADY.COM Linda Arndt ~ Canine Nutritional Consultant Email: |
 |
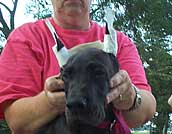
How To Tape Your Dogs Ears |
|
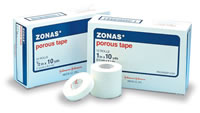
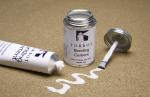
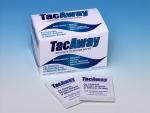
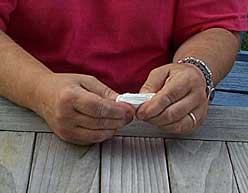
Please note, as stated in my Blackwatch Feed Programs, our dogs are on the products called Nzymes and Oxy-Drops during cropping, healing and during vaccinations. It is very important to communicate to your vet that your puppies ears will heal twice as fast while on the Nzymes. This means the normal time for removing stitches will be drastically be reduced. You should NOT leave the stitches in the normal length of time, because they will become imbedded in the ear. We use Nzymes to speed healing and Oxy-Drops in a diluted solution (1 teaspoon Oxy-Drops + 1 cup of distilled water), sprayed on the edges to stop bacterial infections and to speed healing of the ears. Before cropping give your vet the anesthesia guidelines for cropping large/giant breeds. I would like to thank Phil and Jane Gray of Owlwatch Great Danes for allowing me to photograph this ear taping process for educational purposes at this website. How to Tape Ears. There is text, photos and illustrations of this process at this site to print out. READ THIS INFORMATION FIRST BEFORE ATTEMPTING TO TAPE EARS or you could ruin the ears as well as cause infection. Have all materials read ahead of time before you begin the process, this includes 1-2 other people to assist. Materials: 1). GLUE: Use TORBOT Liquid Bonding Cement -latex in a 4 oz can with a brush(not tube) (this replaces the old Skin Bond glue by Smith and Nephew) AND TORBOT TACaway Adhesive Remover to go with this cement. Normally, it wears off after a week anyway, but just in case you may want to get their companion product adhesive remover in case you want the ears down before a week. NO OTHER GLUE IS APPROPRIATE OR SAFE TO USE. To order this bonding cement and adhesive remover online: http://www.torbot.com or call 1-800-545-4254 2). TAPE: Use Zonos Porous Tape by Johnson and Johnson brand - 1" -soft, porous, cloth tape which you will order on line or from your local pharmacy. To purchase tape call 800-861-3211 - or online:http://www.allegromedical.com/index.html NO OTHER BRAND OR TYPE OF TAPE PLEASE.
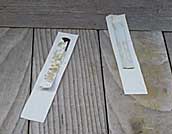
For Pads and Splints Use a square paper towels to make the pillow. The size of pillow will vary according to size of the ear and of course, increase in size with age. NEVER use masking tape, waterproof tape or duct tape or they will have a severe reaction or the ear will rot off in nothing flat! Corset Stays for Splints
- You have two choices for or splints, also known as corset
stays or boning, which are used as the structure to support the ears
(Fig 1). Purchase these online from
Jas Townsend and Sons, and order
a variety of lengths ( 4"- 5"- 6" and a few 8 inch)
so you can expand the length as they mature. These are 1/4" wide
so as the puppies mature you may need to double up (place side by
side) for a broader support. In a pinch you can use also use the black heavy duty 1/4" electrical zip ties that you can get from a hardware, electrical store or Home Depot, Lowes, Menards etc. These work and you can use 2 -4 depending on the width needed for the age of the puppy. Use NO wooden sticks please. But we definitely PREFER the corset stays which you can use over and over for years. The Purpose of Splinting The purpose for this process is to splint the ear using the least amount of materials to get the maximum benefit and comfort considering the process is pretty unnatural. Preparing the Stays
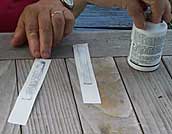
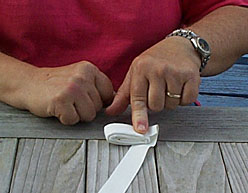
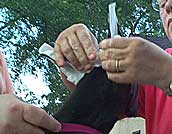
The length of the stay should be from the tip of the ear, down to just above "the button" on the inside the ear. Measure, trim and prepare the "stay" by covering with a 1" piece of tape on both sides(Fig.3) make one piece a longer piece of tape so it will fold over the top of the tip of the ear to protect it. Apply glue to the sandwiched stay and the glue goes on the side with short tape(Fig. 2)and (Fig.10) Take one sheet of paper towel and fold in half (Fig 4) then again in to fourths (Fig.5) and then fold it up into a pillow (Fig. 6), cover it with tape.(Fig.7) This pillow will be glued directly on top of the Stay that rests on the little button inside the ear to give you some support to that area of the ear that likes to flop over. The pillow is approximately 1 1/2 inches wide by 2 inches long on younger puppies and it will increase according to the size of the dog. (Fig.7)
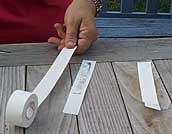
Now, cut 2 strips of tape ahead of time (1 is a spare) about 8-9" long - set aside out of puppy reach. Then cut 2 strips of tape ahead of time that will be about 8-9 " long for the brace - set aside. Here We Go This is where all that table training has paid off. This takes at least two people, three are better for beginners!.
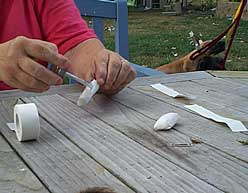
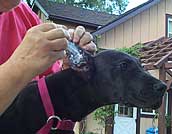
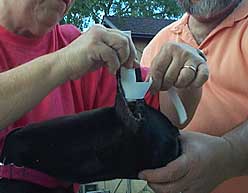
Roll the pillow up in a strip of tape (Fig. 8A) and then paint surgical glue on the pillow - set aside and let it set up a minute until it is tacky.(Fig. 8) Now paint surgical glue on the inside of the puppy's ear, running a strip of it from the bottom to the tip of the ear (Fig.9) Let it set a minute to get tacky as well.
Make sure the dogs head is looking straight ahead -NOT tipped up or down or the ears will not be set right. With top head plane level, pull the ear up gently so it is straight. READ THIS SECTION BEFORE
DOING IT: Then attach it up the ear to the very top folding the extra piece of tape over the top and securing. Repeat with the other ear. (Fig 10).
Paint glue on the lower end of the stay (Fig.
12) where the center of the pillow will be place. Note:
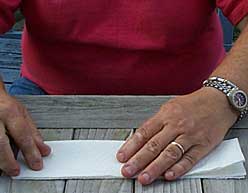
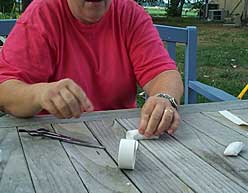
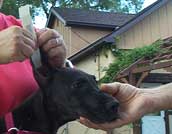
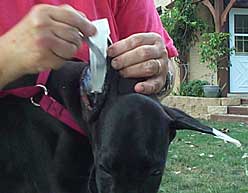
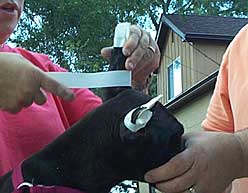
While you are facing the puppy, place the tape on the pillow and LAY the tape around the base of the ear - do not pull or wrap tightly - only LAY the tape around and gently squeeze to adhere. (Fig. 14) Continue with other ear (Fig. 16). Make sure you do not go against the grain, there is a flap of skin there that needs to fold in it's natural direction. Some people like to place a little Gold Bond Powder behind that flap before taping to help absorb moisture.
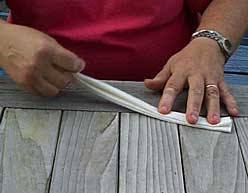
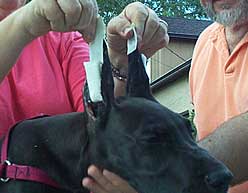
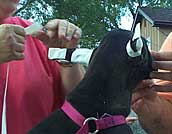
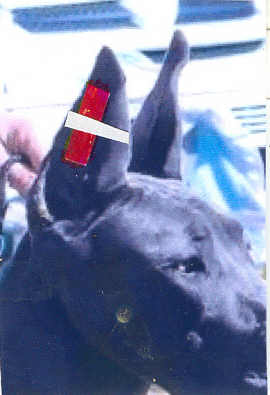
With someone holding both ears upright (Fig. 17), place a piece of tape across the front and back to make a support bar, not getting the ears bent in too close or out too loose.(Fig.18). Provided there is no odor, swelling or sores, you will see they start to come down themselves in a few days. This will vary depending on whether the puppies are part of a litter or alone in a family. The first time they are taped it is generally 7-10 days. Just WATCH THEM DAILY. When they are starting to fall apart, the adhesive wears off and you can gently pull the stays away and get them ready for the next taping, after a couple of days rest. You may need to use adhesive remover on a Q-Tip to help remove the stay from the tip of the ear. BE CAREFUL NOT TO PULL THE TIP OF THE EAR OFF WHEN YOU ARE TRYING TO REMOVE THE TAPE!!! I leave them down a day or two to rest, cleaning them with soap and water afterwards or before retaping. Make sure they are dry and there is no moisture under that flap of ear skin that is on the front of the dogs ear, or it will develop bacterial infection or fungus. You might want to powder that flap with medicated gold bond before retaping. Frequency Of Taping The general time between retaping is initially about 7-10 days and as they mature it may be that you have to redo them them from 5 - 7 days. You simply have to check them daily for sores and making sure they are STRAIGHT UP, and the dog is able to manipulate them so they strengthen the muscles of the ears across the top of the head. You do not want the pillow popped out, because the ear then folds inwards causing a permanent crease. If this happens, you may have to simply reposition the pillow and redo the brace without removing the stays. The length of time for taping an ear is individual, based on the type of ear leather, the cut, the particular animal so do not give up. I have some dogs ears stand by 4 months and others we taped until they were older. Normally once they get past the teething stage at 6-7 months the ears start to stand as long as you have been diligent with your taping. Always check daily for discharge or odor. Let the ears rest at least 24 hours to air out before each retaping. The Ear Taping Illustrations also
located at this website are courtesy of Phyllis Lockwood of Willowrun
Kennels. Taping An Older PuppyAt about 5 months of age when the tough teething period starts, the ears often get limp again or start to break in the middle. This is one method of taping the ears at this point, as long as the bases are firm and standing properly.
Thank you to Phil and Jane Gray of Owlwatch Kennels and their puppies, for demonstrating the taping techniques in these photos. Here are some drawings
too, compliments of Willowrun Kennels. |
|
|
|
|About Us | Album
| Interview | Articles
| Links | Breeders
Showcase | GREAT Great Danes
| Linda's Artwork
| Email: Copyright © 2002-2003 GREATDANELADY.COM |